Discover the simple steps to hang your bicycle on a wall, saving space and adding an aesthetic touch to your room.
Hanging a bike on a wall not only saves space but also prevents damage, making it an excellent storage solution for cycling enthusiasts. This process, while seemingly straightforward, requires careful planning and execution to ensure the bike’s safety and the integrity of your wall.
This article will guide you through selecting the right wall mount, finding a suitable wall, and properly installing the mount, followed by tips on how to hang your bike securely. Detailed instructions and safety precautions are covered to ensure your bike is displayed safely and stylishly.
Key takeaways:
- Select the right type of rack for your bike.
- Choose sturdy and suitable bike hooks for wall mounting.
- Locate wall studs for secure installation.
- Verify weight capacity of bike hooks and don’t exceed it.
- Properly drill holes and install the wall mount bike rack.
Identifying the Right Type of Rack for Hanging a Bike
Numerous rack models cater to different needs and styles of bikes, including floor stands, gravity stands, and wall mounts. When selecting the ideal type, consider the bike’s weight, tyre width, the availability of wall or floor space, and whether the rack will store the bike vertically or horizontally.
Floor stands offer ease of access and work for all bike styles, but occupy floor space and may not be suitable for heavy bikes.
Gravity stands lean against walls, accommodating up to two bikes, but require a solid surface support.
Wall mounts save floor space, but necessitate wall drilling and can hold weight depending on the stud’s strength.
Choosing the Right Bike Hooks for Wall Mount
The variety in bike hooks available on the market caters to distinct needs and specifications. For heavier bikes or those with wider handlebars, you may require more substantial, sturdier hooks. Those made from steel with a vinyl coating strike a perfect balance between strength and protection of your bike from scratches.
For those with smaller, lighter bikes, minimalist hooks can be an aesthetic and practical choice. However, ensure they have some form of padding to protect the rim.
Vertical or horizontal orientation is another key element while deciding on hooks. Vertical hooks require less wall space and are ideal for tight spaces, whereas horizontal hooks may be preferred for display purposes or easy accessibility.
Lastly, look for hooks with an easy installation process and check if installation hardware, like screws, are included. Choose a hook that aligns with your skill level or willingness to install.
Finding the Wall Studs for Secure Installation
For a sturdy setup, locating the wall studs is paramount. Utilize a stud finder for accuracy. Simply glide it across the wall and it will beep or light up when a stud is detected.
Always ensure you measure the distance between the studs, which is typically 16 to 24 inches in most homes. This is crucial as the bike rack needs to be mounted into the studs to safely bear the weight of your bicycle.
Where a stud finder is unavailable, knock on the wall softly and listen for a solid sound instead of an echo to locate studs. Although less accurate, this method can be a practical alternative.
Determining Weight Capacity of Bike Hooks
Assurance of the weight limit of your bike hooks is crucial for the stability and safety of your bicycle. You’ll want to verify the specific weight capacity indicated by the manufacturer, which usually ranges between 30 to 60 lbs for standard hooks. This capacity takes into account the weight of the bike but also the force imposed when hanging or removing it from the hook.
Do examine your bike’s weight, most adult bikes weigh around 20-30 lbs, while kids’ bikes are lighter, about 10-20 lbs. Always opt for hooks with a higher weight limit than your bike for an extra safety layer. Avoid exceeding this limit to prevent potential damage to the bike, the wall, or potential injuries.
Marking the Spots for Drilling Holes
After you’ve determined the placement based on weight capacity and bike dimensions, it’s crucial to mark the drill locations accurately. Use a level and a pencil to ensure precision, marking the drill points on the wall where the screws will go.
If your bike mount comes with two points of contact, measure the distance between these points on the rack itself and translate this onto the wall. This will ensure your mount is stable and level, a crucial detail in both bike storage and overall interior aesthetics.
Be mindful of wall studs’ location as well. Studs are typically spaced 16 to 24 inches apart in most homes. A stud finder can make this task much easier and more precise. Always aim to anchor at least one of the screws into a stud to secure the mount and ensure your bike’s safety.
Consider the bike’s pedal placement when marking your spots too. You want enough clearance so that the pedals don’t brush against the wall when hanging or retrieving the bike.
Lastly, remember to consider the height at which you mark your drills. You don’t want to be overstretching or crouching down to hang or unhitch your bike. Keep everything within a comfortable reach to make the process seamless and manageable.
Drill the Holes and Install the Wall Mount Bike Rack
Please ensure the power drill is set at the correct speed, ideally, a lower speed is preferred for better control. Hold it perpendicularly to the wall, applying firm pressure to create precise holes. It’s important to go slow to avoid damaging the wall or the drill bit.
Once the holes are drilled, proceed with inserting the wall anchors, often included in your bike rack package. These play a pivotal role in keeping the rack from wobbling under the weight of the bike. Tap them in gently using a hammer until they sit flush with the wall.
Next, align the holes on the rack with the wall anchors. Start to screw in each of the provided bolts or screws, but don’t fully tighten them just yet. Ensure the rack is leveled correctly. Adjust as necessary before giving a final tighten to secure the rack in place.
Remember, this process will vary slightly depending on the type of rack you have. Some may have in-built levels and additional securing points. Always refer back to the manufacturer’s instructions to ensure a safe and secure installation.
Understanding Optimal Height for Hanging a Bike
Determining the correct height is crucial for ease of access, bike safety, and usability of the bike rack. Aim to keep the center of gravity low. Typically, the bike should be hung so that the wheels are at eye level or lower. This makes it easier to control the bike when you’re hanging or removing it.
Take into account the riders’ height, the type of bike, and the height of the ceiling. If multiple bikes are being hung, the bikes can be alternated between higher and lower positions. The kids’ bikes, generally smaller and lighter, can be hung at a higher level an adult can reach.
Remember, the hanging height should allow the bike to be off the ground to prevent accidental trips and falls, but not too high that it challenges retrieval.
How to Properly Hang Your Bike On the Wall Rack
Starting from the front of the bike, gently lift it and hook the front wheel onto the bike rack. Ensure the wheel’s rim is resting on the hook and not the spokes to avoid damaging them.
Next, you’ll need to lift the back of the bike and hook the rear wheel. Once again, make sure it’s the rim that’s resting on the hook. In the case of vertical racks, where the bike hangs by its front wheel, robustly secure the rear wheel to prevent swaying.
Aim for an even distribution of weight across both touches – this minimises pressure on the frame and prolongs the bike’s lifespan.
Lastly, double-check the bike is secure to prevent accidental unclipping.
Method for Hanging Kids’ Bikes On a Wall
When dealing with children’s bicycles, size and weight are typically less of a concern. Still, balance is an overarching priority when hanging, ensuring even distribution of weight to avoid tilting. Follow these simple steps for hassle-free kid’s bike storage:
1. Determine the center of gravity: Lift the bike with one hand to find the midpoint along its length where it balances horizontally.
2. Align with the hook: This point should align with the bike hanger. If your rack has multiple hooks, use the front wheel hook for this point.
3. Hang the bike: Lift it by the top tube or step-thru area, placing the balancing point on the hook. Make sure the tires are flush against the wall.
4. Double-check: Ensure the bike rests securely and does not tilt or sway. One should adjust the position if it does.
When executed correctly, this efficient storage method will keep kid’s bikes safe and secure yet readily accessible for their next cycling adventure.
Best Spots in the House for Hanging Bikes
Location choice for bike hanging is crucial to maximizing space efficiency and maintaining the aesthetic integrity of your home. Here are some key points to consider:
1. Garage walls: By far the most popular choice, garages offer expansive wall spaces typically away from living areas and prominent decor. As an added benefit, garages often deal with minimal foot traffic reducing the chance of unintentional collision.
2. Near the entrance: An especially convenient spot for daily cyclists, allowing for easy access and minimizing the bike’s contact with the home interior.
3. Hallways: Utilized occasionally due to their unique long-wall layout. Keep in mind that the suspended bike shouldn’t impede walking space.
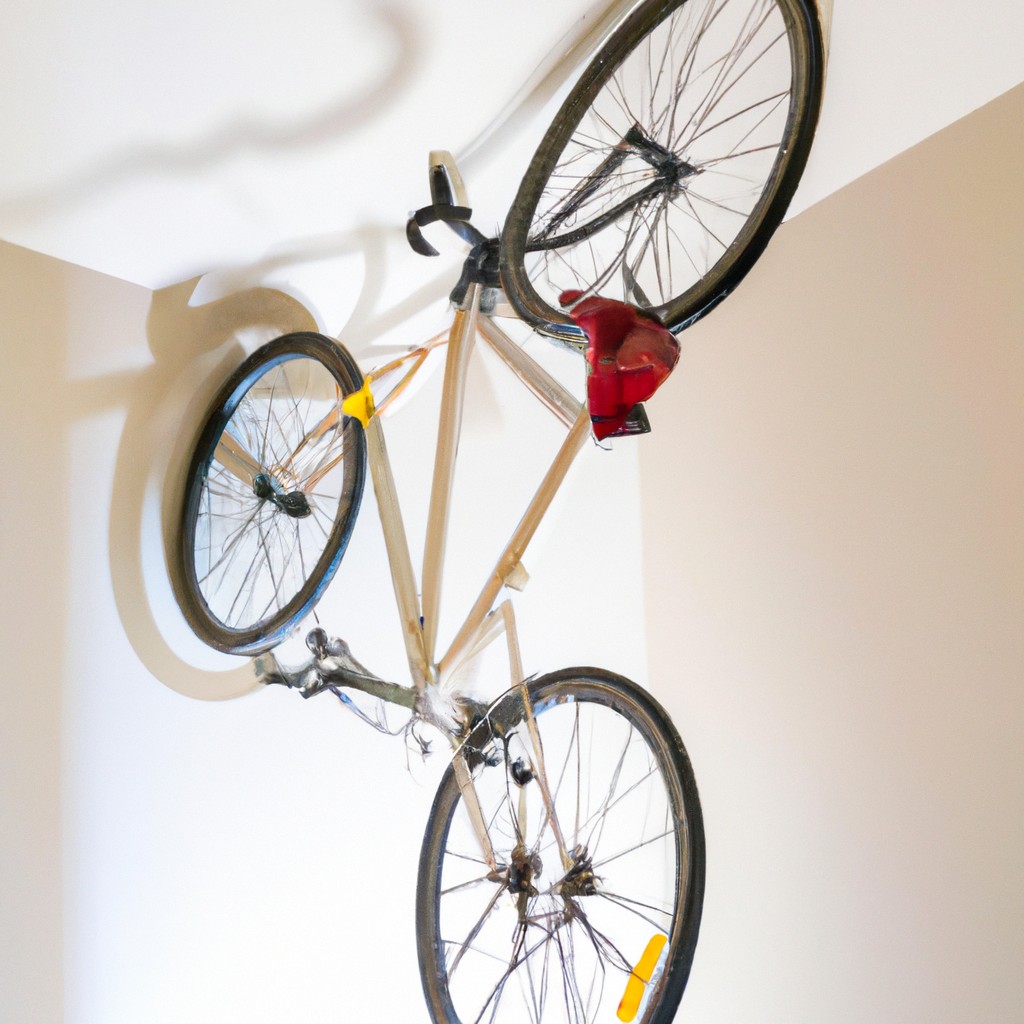
4. Ceiling of storage rooms: Often overlooked, the ceiling can be a perfect bike spot in low-traffic areas like storage rooms.
5. Behind doors: The back of a bedroom or closet door can be an unconventional spot, especially for small bikes or when space is limited.
While choosing the spot, always consider the bike’s dimensions, the required accessibility, and the safety of your home’s occupants.
Considerations for Multiple Bike Hanging Arrangements
When dealing with multiple bikes, arranging them efficiently requires a plan. Here are some essential points to consider:
1. Vertical or horizontal: Vertically storing bikes can save significant floor space and is ideal for narrow walls. Horizontal arrangements allow easy lower-level access and tend to spread more evenly across the wall.
2. Spacing: Ensure enough space between bikes to prevent damage. A minimum of 12 inches between each bike is advisable.
3. Staggering: Staggering bikes – hanging them at varying heights – is an effective way to fit more bikes on the wall while maintaining sufficient space between them.
4. Weight Distribution: Aim for even weight across the wall to prevent mounting hardware strain and potential wall damage.
5. Variety of Bikes: Factor in the types and sizes of bikes owned. Mountain bikes typically require more space than road bikes. Kids’ bikes may fit well in smaller spaces.
6. Access: Think about which bike is used more frequently. Hang it at a level where it can be easily accessed and put away.
Bike Maintenance and Safety While Using Wall Mounts
Once up, regular inspections of the mount and bike should be incorporated into routines. Ensure the bike rack remains sturdy and secure. Any signs of wobbling or instability indicate a need for immediate attention. Likewise, the hardware of the bike, particularly the areas that come in direct contact with the rack, can benefit from periodic checks for wear and tear.
Care and caution extend to the act of hanging and unmounting the bike as well. Make sure to lift the bike gently onto and off the racks, not only to prevent any accidental damage to the bike or mount but also to avoid any potential injury.
Finally, clean the bike before hanging, especially after a muddy or wet ride. This prevents dirt and moisture from dripping down your wall and maintains the longevity of the bike’s components.
By incorporating these ideas into your wall-mounted bike practice, you’ll make the most out of the investment, ensuring the safety and longevity of both your bike and mount.
FAQ
Is it OK to hang a bike from one wheel?
Yes, it is perfectly fine to hang a bike from one wheel as the wheel is designed to handle loads significantly heavier than the bike itself.
Is it OK to hang your bike by the frame?
Yes, it is perfectly acceptable to hang your bike by the frame as it can aptly handle the weight of the entire bicycle.
What's the best way to hang a bike?
The optimal method for hanging a bike is by utilizing vinyl coated bike hooks which offers organization and space-saving benefits.
Do I need a stud to hang a bike?
While a stud is typically used to hang a bike, it is not essential as you can alternatively use a hook board to support the bike.
What type of wall mount is best for heavy bikes?
The best type of wall mount for heavy bikes is a sturdy, high-load capacity mount, such as the Ibera Horizontal Bicycle Wall Hanger.
Does the method of hanging a bike affect its overall performance?
The method of hanging a bike has no proven effect on its overall performance.
How can one install a bike mount on a plaster or drywall without damaging it?
To install a bike mount on plaster or drywall without damaging it, one can use specialized plasterboard fixings that distribute weight evenly, minimizing the risk of damage.
Related
- How to Store Bike in Apartment: Simple & Space-Saving Methods
- How to Put a Bike on a Bike Rack: Detailed Guide for Easy Installation
- How to Lock a Bike: The Comprehensive Guide for Secure Cycling
- How to Turn on Peloton: Quick and Easy Steps
- How to Measure Bike Size for Kid: Simple Steps for the Perfect Fit